Monitoring your Validator Node
Overview
There are a number of solutions for monitoring validator nodes but this guide will focus on the TenderDuty monitoring solution (https://github.com/blockpane/tenderduty). Tenderduty is a comprehensive monitoring tool for Tendermint chains and its primary function is to alert validators if their nodes are missing blocks. It provides a web dashboard, prometheus exporter, telegram, pagerduty and discord notifications integration and multi-chain support. It is recommended to install the applications and services below on a separate server to allow for monitoring your validator node in the event the node goes offline for any reason.
Installation
For this guide we’ll be installing Tenderduty on Ubuntu 20.04 but this can be done on most modern Linux distributions and latest versions of Mac OS.
Update OS and Install Prerequisites
Before installing Tenderduty, there are a few prerequisites that need to be installed. The following command will update the local package list and install any available updates:
sudo apt-get update && sudo apt upgrade -yThis next command will install essential tools and ensure accurate time synchronization:
sudo apt-get install make build-essential gcc git jq chrony -yInstall Go
Tenderduty is built with Go and so we need to install Go in order to execute the app. The following website will give you the download instructions for your operating system https://go.dev/doc/install. The current version as of the creation of this document is v1.18.3. We can download this version to our node by executing the following:
wget https://go.dev/dl/go1.18.3.linux-amd64.tar.gzOnce downloaded we can install the app in the /usr/local directory:
sudo tar -C /usr/local -xzf go1.18.3.linux-amd64.tar.gzLet's add Go to our path. Edit the profile file:
nano ~/.profileAdd the following to the file:
After updating the file, execute the following command so the changes can take effect:
You can test that Go is installed by executing:
which should show the version number of go installed.
Install Tenderduty
The latest installation guide for Tenderduty can be found at https://github.com/blockpane/tenderduty/blob/main/docs/install.md. The following steps were taken to install the package at the time of this writing.
Create new user
Execute the following commands to create a new user account which will be used to run the tenderduty application:
Configure Go for the new User
Go was already installed above and so we only need to add Go to the path of the newly created user account. Log into the newly created tenderduty account by executing the following:
Edit the profile file by executing:
Add the following contents to the file:
After updating the file, execute the following command so the changes can take effect:
You can test that Go is installed by executing:
which should show the version number of go installed.
Install Binaries
Make sure you are logged into the Tenderduty account and execute the following to install the binaries:
Configure Tenderduty
In order to configure Tenderduty to monitor your validator node on the desired chain you need to edit the config.yml file created above.
Within the config.yml file the default chain setup points to Osmosis. Make the following changes for the Sifchain network:
Under “chains” change “Osmosis” to “Sifchain”. This is a name that will be used for labels.
The table below will give details as to the other changes that are required:
chain_id
sifchain-1
Set the chain ID for Sifchain’s BetaNet.
valoper_address
This is the operator address for your validator node. The address starts with “sifvaloper”.
You can go to https://www.mintscan.io/sifchain/validators to find the list of active and inactive validator addresses.
url
This is the rpc address to your validator node. By default it should be “tcp://<validator_ip_address>:26657”
This is the first url object found under the “nodes” section. Make sure websocket is enabled for your validator node. NB: Other public RPC nodes can also be used.
url
This is a backup RPC node and can be any public node.
This is the second url object found under the nodes section.
Setup Telegram Bot
In the config.yml file under the telegram setting make the following changes:
enabled
yes
Enable the feature
api_key
Something similar to “5555555555:AAAAAAAAAAAAAAAAAAAAAAAAAAAAAAAAAAA”
In telegram, create a chat with “@BotFather”. Select the menu in the chat box and click “Create a new bot”. Enter a name for the bot and then a username which should end with “bot”. An API will be generated with the following structure “5555555555:AAAAAAAAAAAAAAAAAAAAAAAAAAAAAAAAAAA”. Keep your token secure and store it safely, it can be used by anyone to control your bot.
channel
Something similar to “-111010”
Create a channel within telegram and add the telegram bot you created above. Create a message within the channel and then add the API Key above to the following URL https://api.telegram.org/bot<YourAPI_KEY>/getUpdates and copy the chat -> id shown. This is the channel id.
Also note that these values can be set for each chain which allows for having different telegram channels for each chain. Please note you also need to set enabled to “yes” for the “telegram” section under the chain section created above.
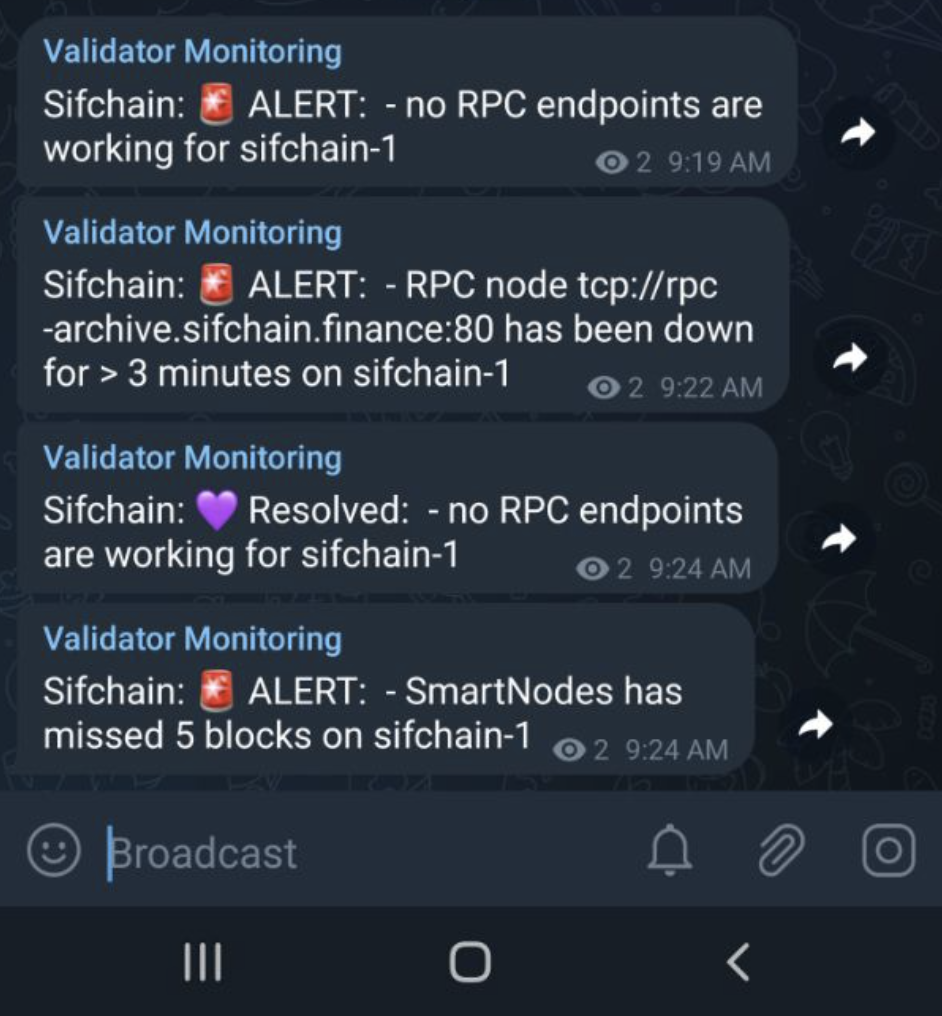
An example of the output from the telegram bot:
You can also enable Discord (https://github.com/blockpane/tenderduty/blob/main/docs/discord.md) and Pagerduty (https://github.com/blockpane/tenderduty/blob/main/docs/pagerduty.md) alerts by setting the required values within the config.yml file.
Exit out of the tenderduty account by executing the following:
Setup Tenderduty Service
Create the service file:
Add the following content to the file:
Execute the following commands to enable and start the service:
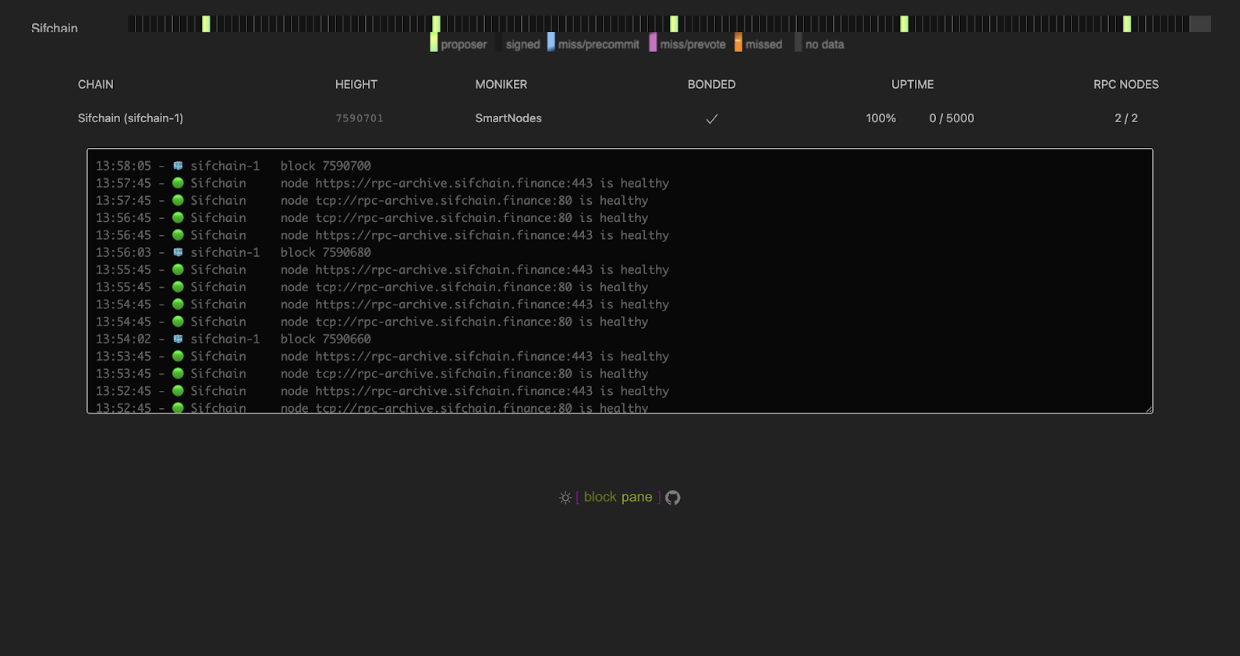
You can now access tenderduty by going to the following URL, changing the <ip_address_of_your_server> value to the actual IP address of the server Tenderduty was installed on:
You should see something like the following:
Other Node Monitoring Setup Guides
The following guides provide some alternative options for monitoring your validator nodes:
https://chainflow.io/cosmos-validator-mission-control/
https://medium.com/simplystaking/cosmos-monitoring-and-alerting-for-validators-8e3f016c9567
Last updated